# Template Quick Setup
A **Device Template** is a set of configurations inherited by devices of a similar type.

Think about smart home switches. They all perform a similar function and it's safe to assume that they should have the same data model, GPIOs, firmware code, etc. You can create a SmartSwitch template and then create multiple SmartHome switches from it.
## Tutorial Overview
While Device Template has a lot of settings, in this tutorial, we focus only on the most important settings to get your devices up and running quickly. By the end of this tutorial, you should have a working device that will:
* Send random values to the web and mobile dashboard in given intervals
* Receive user input from the web or mobile dashboard UI elements
{% hint style="info" %}
You would need a development board (e.g. Node MCU, Arduino). A list of supported boards can be found [here](https://docs.blynk.io/en/~/revisions/ynmC8lZ6FPocTYWigjcO/blynk.edgent/overview).
{% endhint %}
Full documentation on all of the Template settings can be found [here](https://docs.blynk.io/en/~/revisions/ynmC8lZ6FPocTYWigjcO/blynk.console/templates/working-with-templates).
## **1. Enable Developer Mode**
Before moving further, make sure that you have **Developer Mode** enabled:
1. In the Blynk app or in Blynk.Console
2. Navigate to **My Profile** in the left menu of the app or the top right corner of Blynk.Console
3. Check that the **Developer Mode** switch is set to ON
{% hint style="warning" %}
Currently, **only one developer is allowed per Organization in Free and Maker plans** to avoid sync issues.
{% endhint %}
## 2. Edit/Create Template
Open the Templates section (Developer Zone -> My Templates) in the left menu and click **+ New Template** button**.** If you already have a template - click to open it and press **Edit** button.
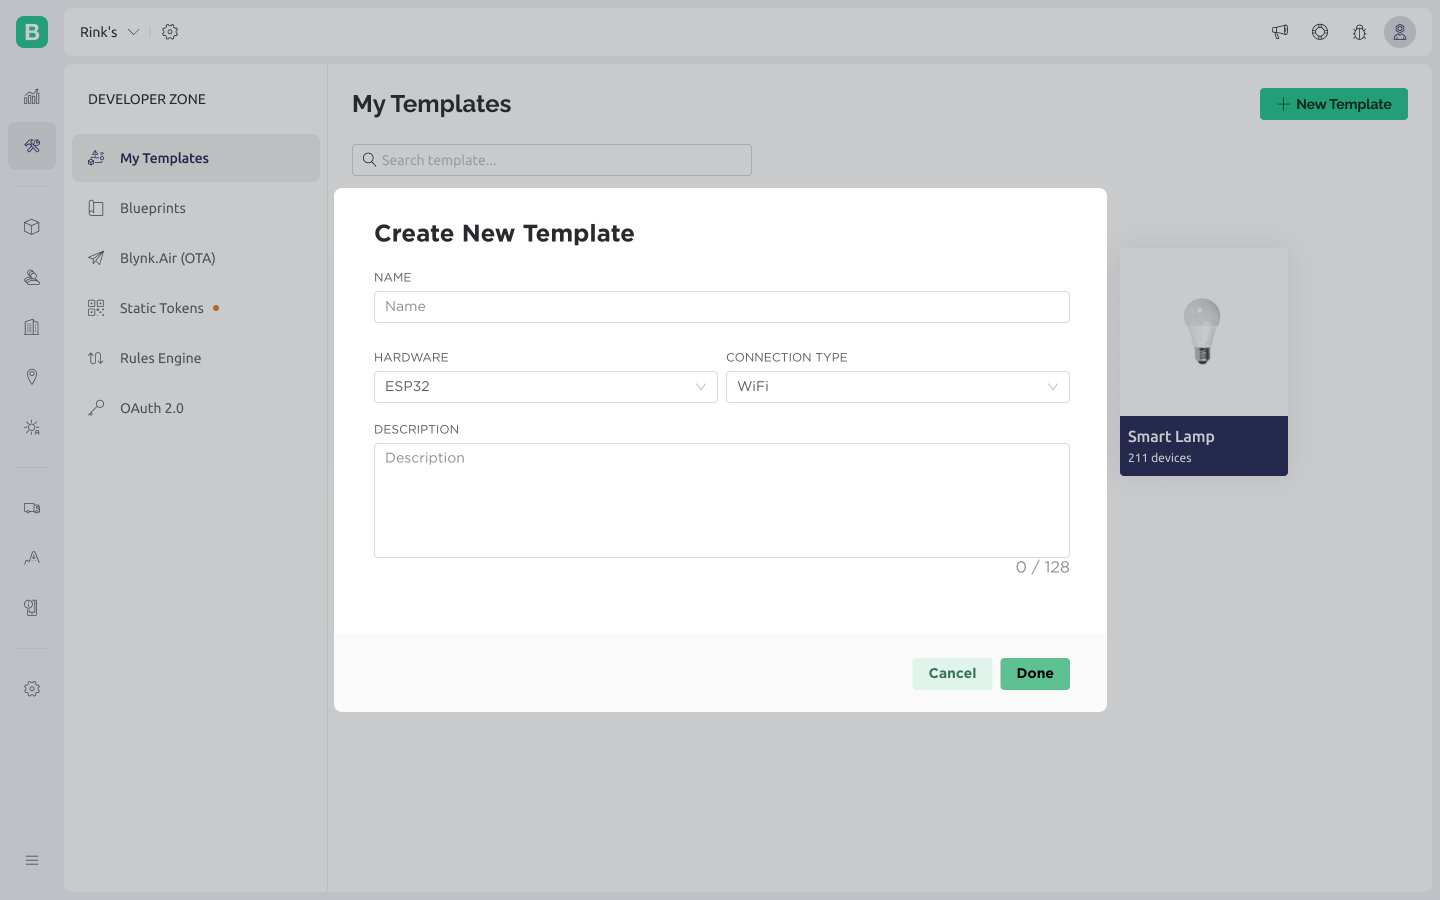
## 3. **Basic** Settings
Give your new template a name, specify the hardware and connectivity you will be using.
{% hint style="info" %}
If you can't find your hardware in the list choose **Other**
{% endhint %}
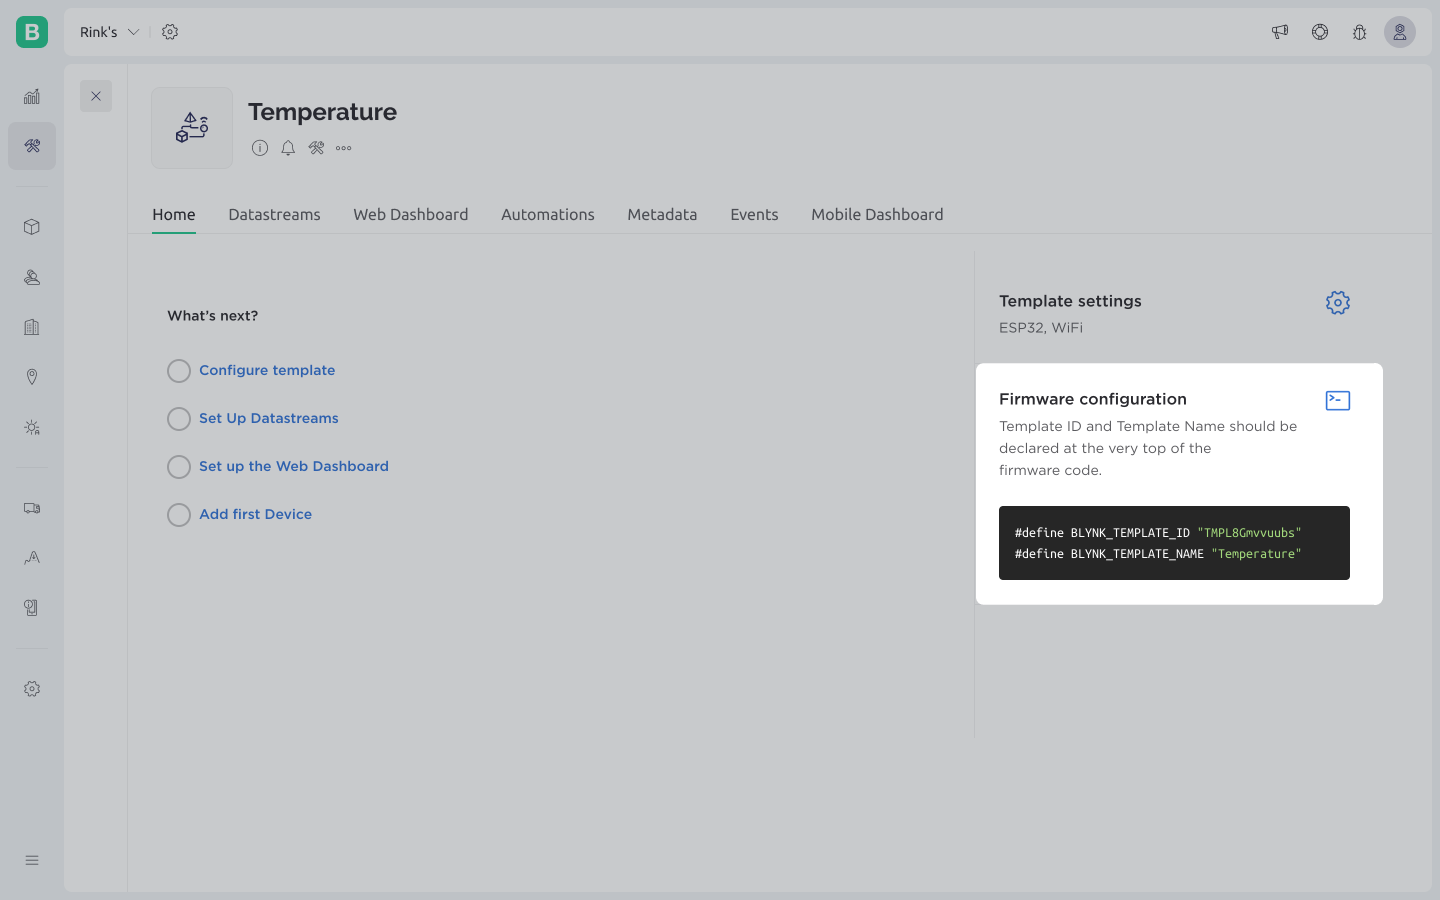
## 4. Find **Template ID**
A new Template is now created. On the screen below notice **Template ID** and **Firmware Configuration** sections. You will need these details later in your sketch.
## 5. **Set Up Mobile Dashboard**
1. Open [Blynk.Apps](https://docs.blynk.io/en/~/revisions/ynmC8lZ6FPocTYWigjcO/blynk.apps/overview)
2. Log In to your account
3. Switch to [Developer Mode](https://docs.blynk.io/en/~/revisions/ynmC8lZ6FPocTYWigjcO/concepts/developer-mode)
4. Find a template you just created on the web and tap on it.
## Configure your board:
1. Open Dynamic Provisioning Template: - [ESP8266 ](https://github.com/blynkkk/blynk-library/tree/master/examples/Blynk.Edgent/Edgent_ESP8266)- [ESP32 ](https://github.com/blynkkk/blynk-library/tree/master/examples/Blynk.Edgent/Edgent_ESP32)- [MKR1000 ](https://github.com/blynkkk/blynk-library/tree/master/examples/Blynk.Edgent/Edgent_MKR1000)- [MKR1010](https://github.com/blynkkk/blynk-library/tree/master/examples/Blynk.Edgent/Edgent_MKR1010)
2. Specify [TMPLID](https://docs.blynk.io/en/blynk.console/templates/info/template-ids), [SSID WiFi](https://docs.blynk.io/en/~/revisions/ynmC8lZ6FPocTYWigjcO/blynk.console/templates/info/hotspot-prefix) and Board Name in the [sketch](https://docs.blynk.io/en/~/revisions/ynmC8lZ6FPocTYWigjcO/getting-started/activating-devices)
3. Upload this code to your board
### Congratulations, you have configured your device and it is ready to use!
Now all that remains is to [add your test board using Blynk.Apps](https://docs.blynk.io/en/~/revisions/ynmC8lZ6FPocTYWigjcO/blynk.apps/device-management/add-new-device), make sure it works as you expect, and integrate your code.