OTA: Firmware Over-The-Air updates
Blynk offers an interface to easily update your devices over-the-air. It's called Blynk.Air
OTA works only with ESP32, ESP8266, Seeed WiO Terminal, Arduino MKR1010, Arduino Nano 33IoT, and Texas Instruments CC3220. Raspberry Pi will be supported soon.
Currently, OTA can only work over WiFi
Overview
The process of updating the device firmware over the air looks like this:
Prepare your board to accept firmware over the air from Blynk
Compile a binary file from your sketch using Arduino IDE
Create new firmware shipping and update device
1. Prepare your device for OTA updates
First, we need to prepare your device to work with Blynk.Air service. Follow the steps below to make it work
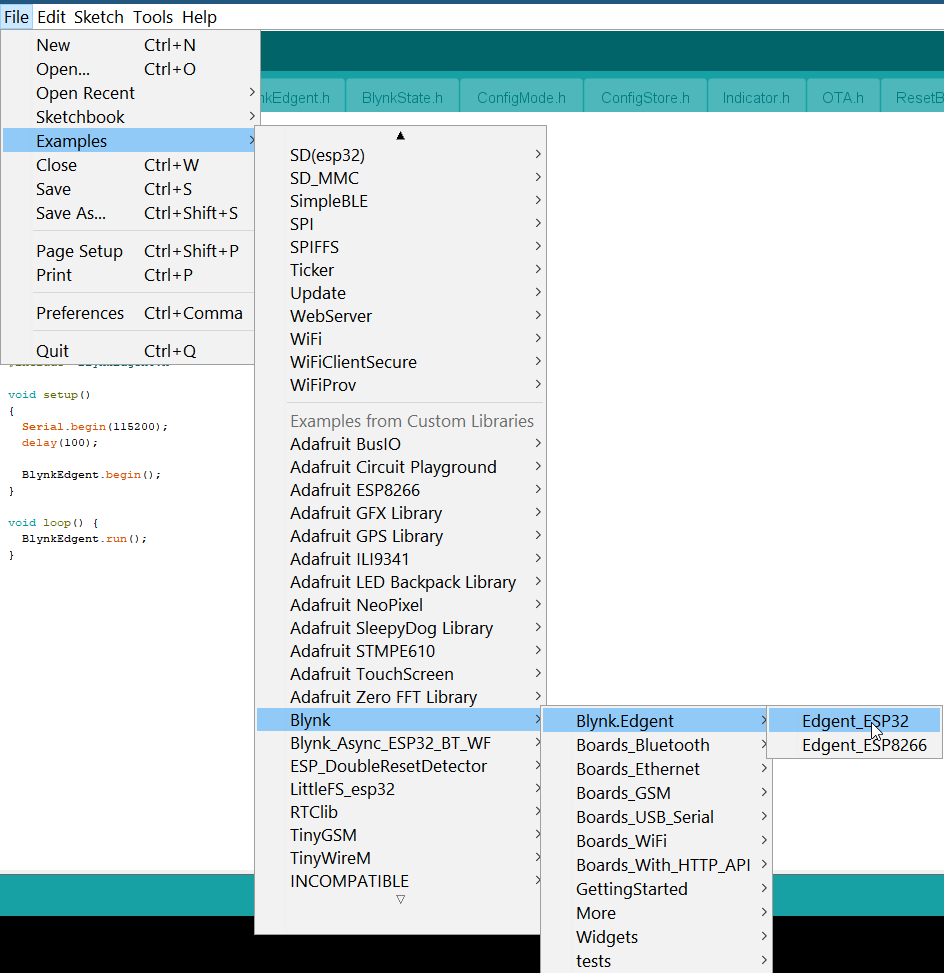
In Arduino IDE open the Blynk.Edgent example sketch for your board.
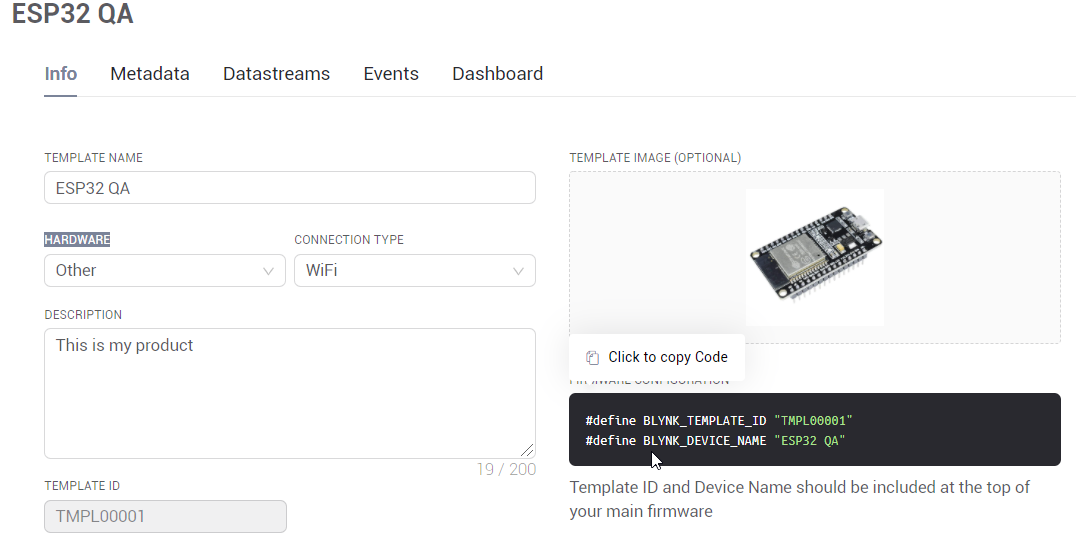
Double-check that Template ID is defined in the sketch. You can always find the TemplateID in Blynk.Console →Template → General Settings
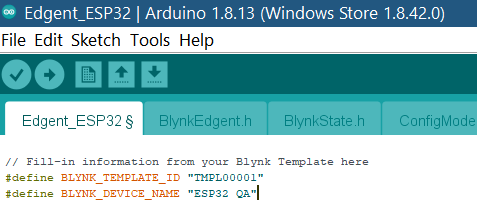
Upload this sketch to your device and make sure it shows up online in Blynk.Console and Blynk.Apps.
2. Compile a Firmware binary file
At this stage your device is ready to accept firmware over the air with Blynk. Now you can write your own code and deliver it wirelessly.
First of all, you need to change the Firmware version. Otherwise, your device will not know this is a new firmware and will ignore it.
In the code find the firmware version and increment it. For example, if it was 0.1.0, change it to 0.1.1. You should do it every time you plan to update your device with new version of code.
Now we need to export your code as a binary (.bin) file.
First of all, go to Arduino -> File -> Save
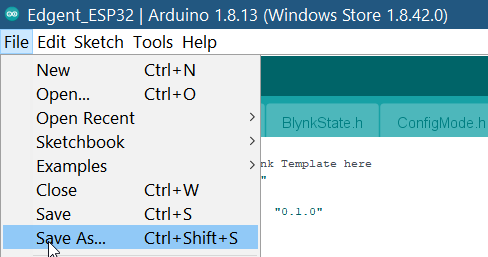
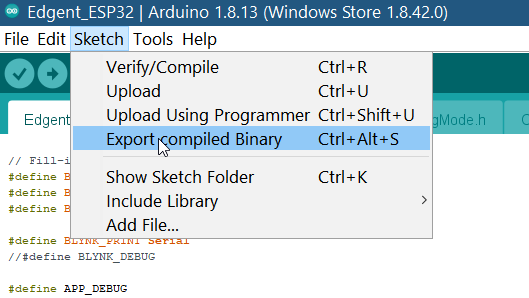
Now go to Sketch -> Export compiled Binary
The .bin file is now in the same sketch folder with other files.
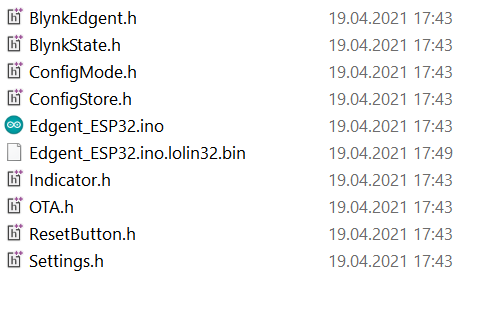
Now you are ready to ship it.
3. Create Shipping
Go to Blynk.Air in Left Menu
Click New Shipping button
Specify Target Selection
4. Select a Template available in the dropdown menu 5. Select Devices available in the Devices list if you want to update certain devices. If you leave the selection empty, all of the devices made from this Template will be updated. 6. Upload Firmware file. Click the area with cloud pictogram and select .bin, .tar binary file in your PC file explorer. Drag'n'drop is supported. 7. Check Firmware info
8. Check for Optional Settings under Template selection field and in _**_Review and start area 9. Press Start Shipping
Now you are all set. The shipping has started.
You will see the progress of the shipping. You can close it, the shipping will continue working.
You can always check your Shippings status and progress by accessing list of all OTA updates.
Read more about over-the-air updates here:
Last updated
Was this helpful?

