Notifications Settings
Blynk offers a very flexible way to send notifications. Users can specify who gets notifications, which events will trigger notifications, and which channel should be used.
Currently, Blynk offers 3 channels to deliver notifications:
E-mail
Push notifications - a push notification is a message that pops up on a mobile device. Users don't have to be in the app to get them
SMS - notification will be delivered as a text message using mobile operator
SMS are currently only available in white-label solution
Managing notifications
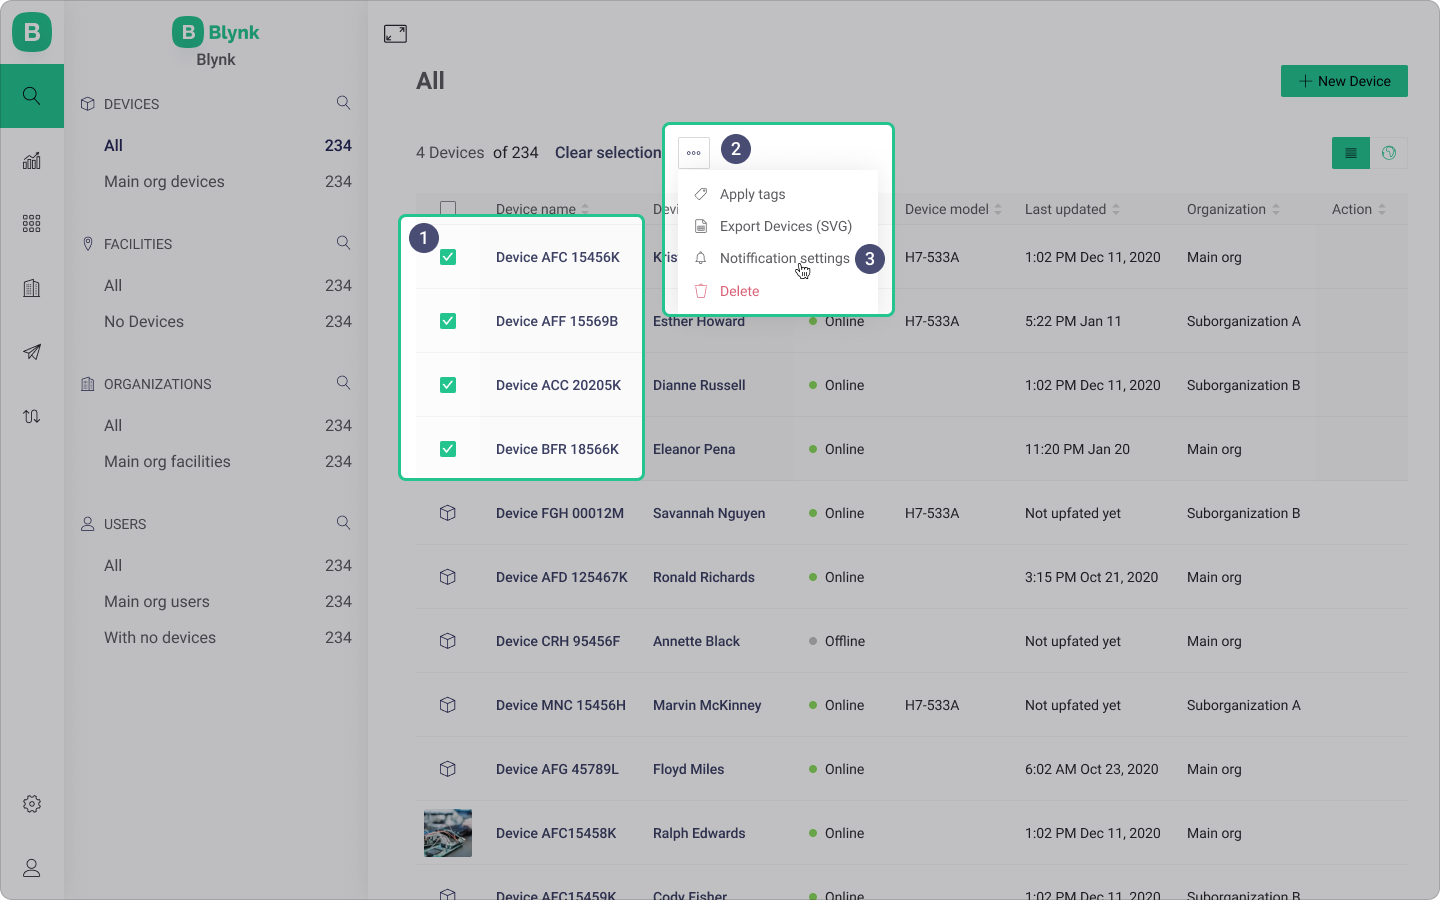
Select single or multiple devices (1)
Hover over the Actions menu [...] (2)
Click Notification Settings (3)

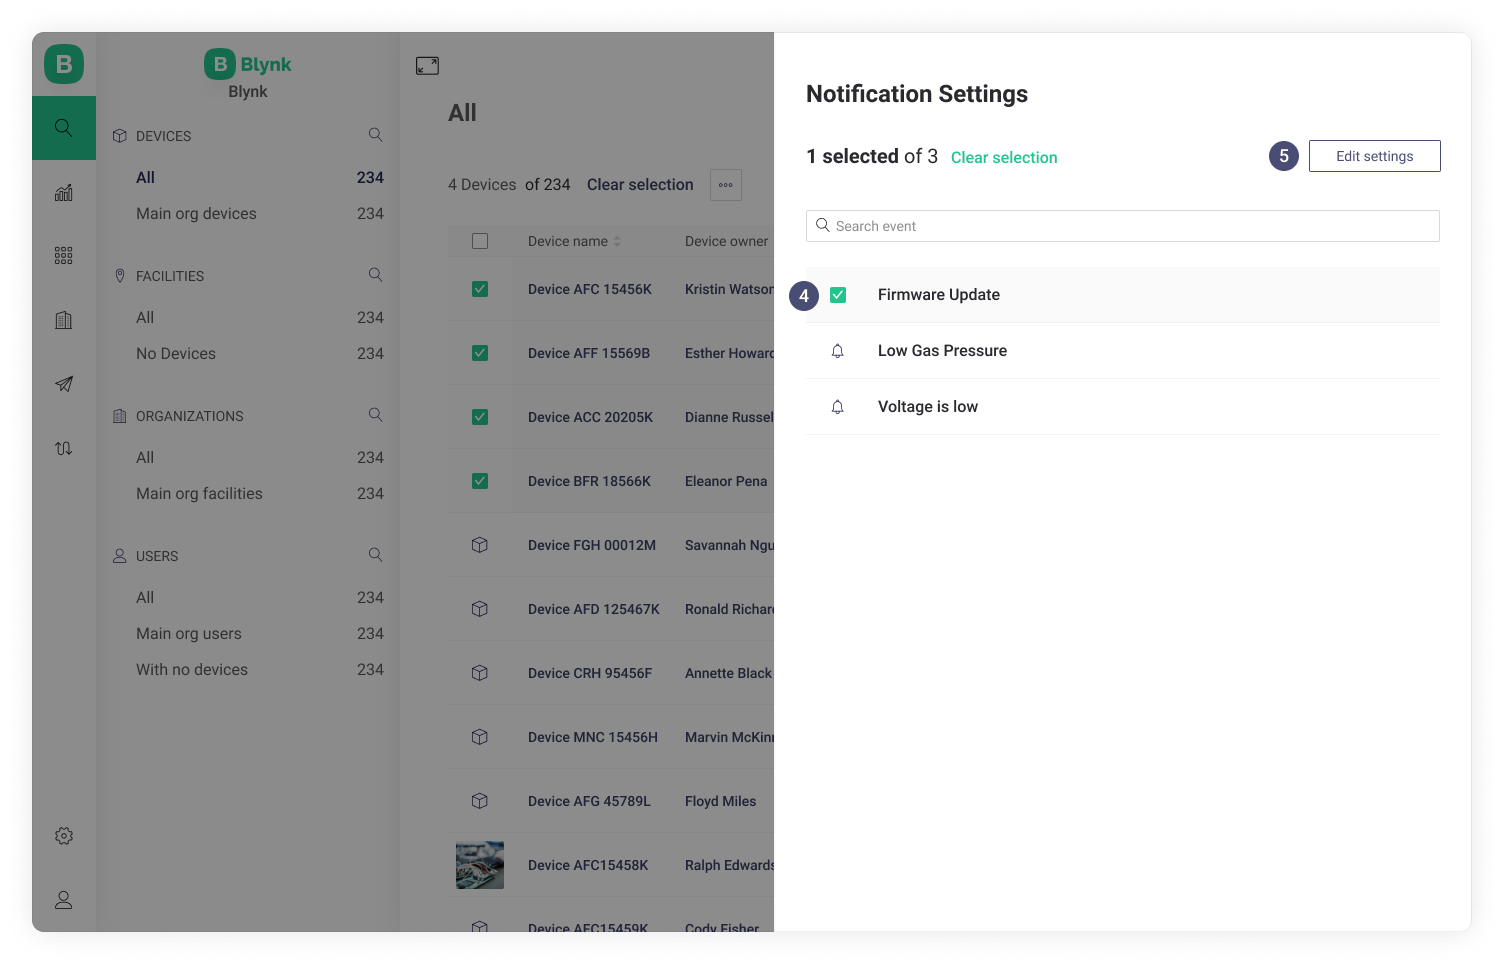
In the opened drawer you will see a list of all Event available for notifications (4) . To specify Events available in Notifications settings, a Developer needs to set it up in the device template.
Click Edit Settings (5)
If you don't see the Edit Settings button, or list of Events is empty, check that you made events available for notifications.

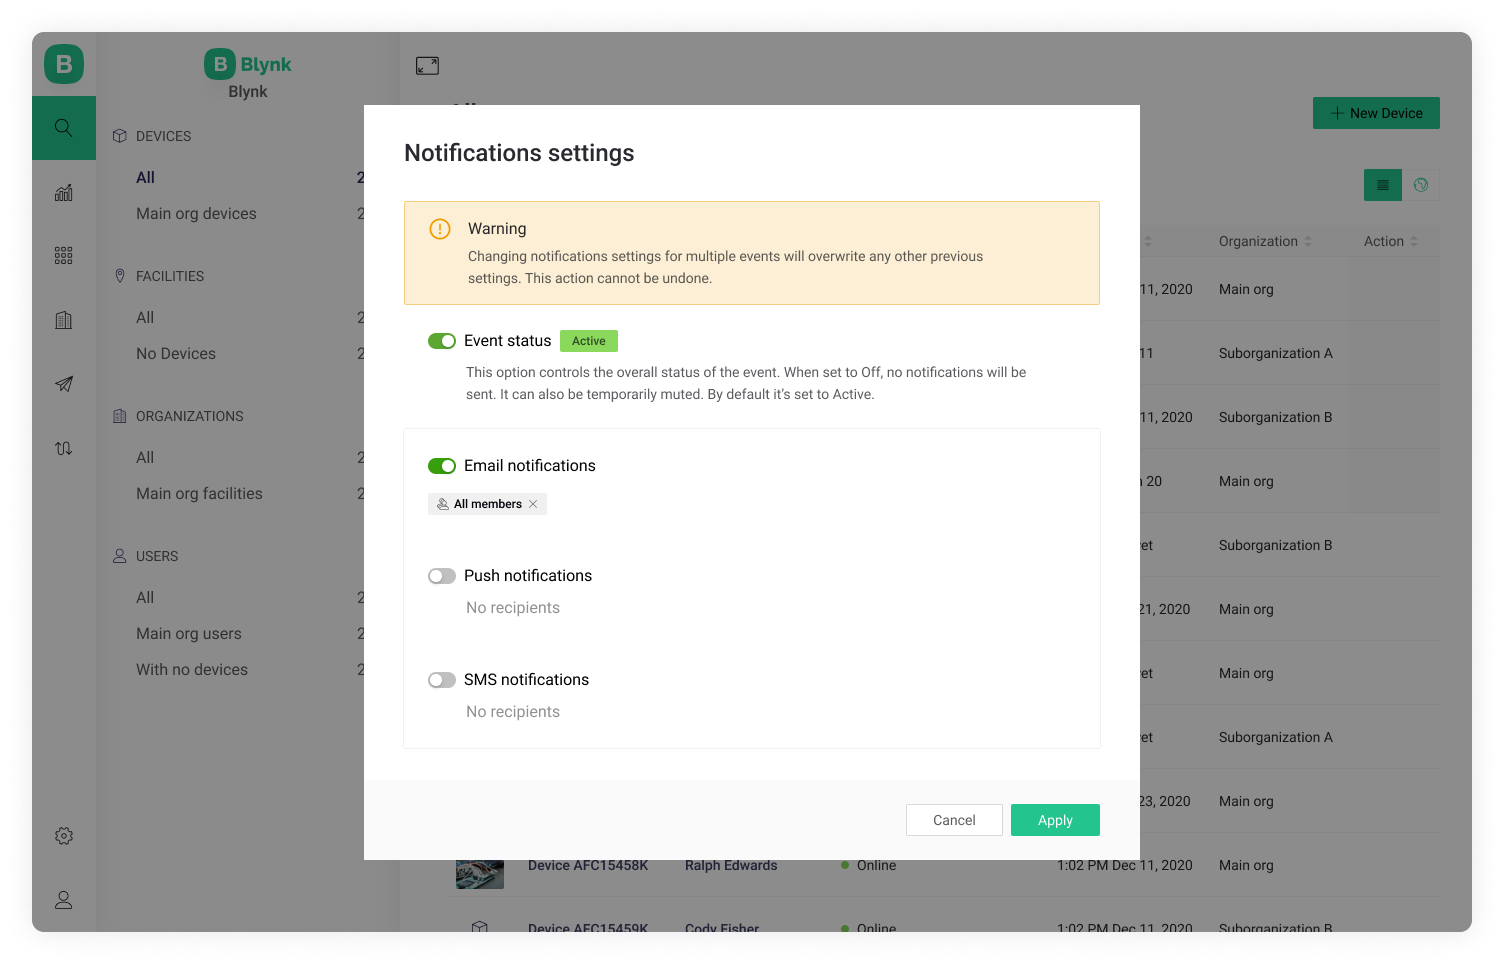
Turn on the desired channels (Email, Push, or SMS) and add recipients. If the recipient is not on the list you can search by typing the name or the email. Optionally you can choose "All members". In this case all members of current organization will receive the notification through the selected channel.
Only registered Blynk users can be notifications recipients.

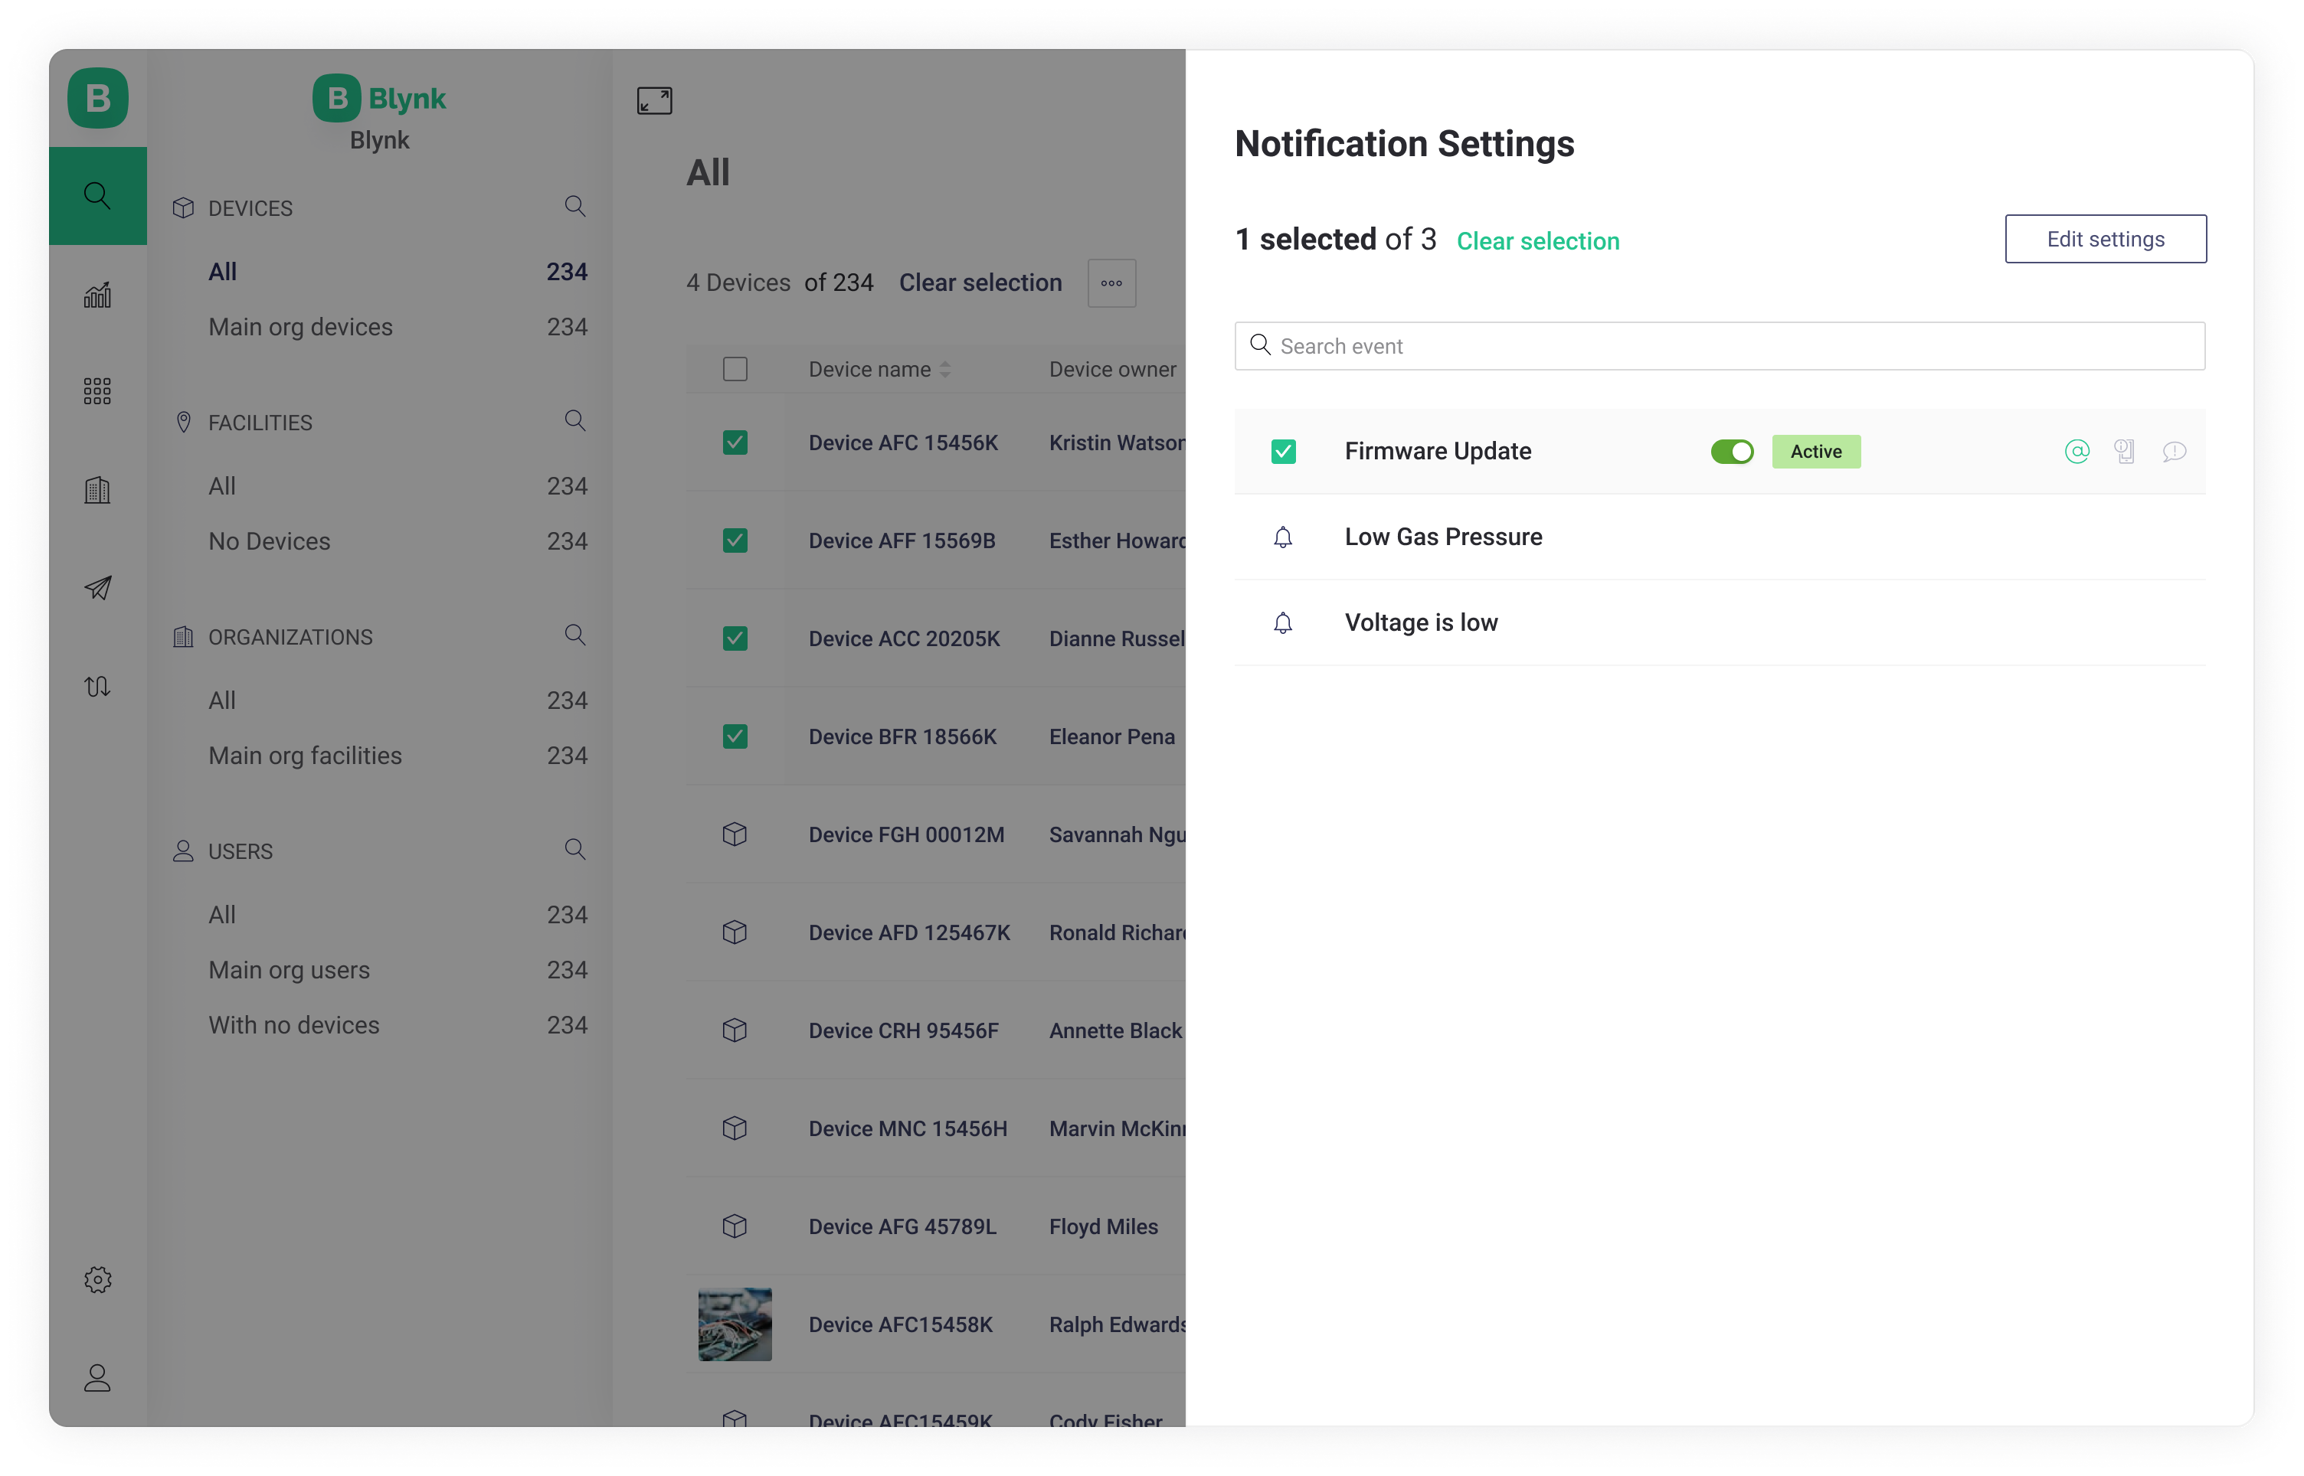
2. Press Apply and you'll see the event status and channels updated.

Muting notifications
Notifications can be muted for a specified period of time. Click on the switch near the Event status and you will get a dropdown menu with the mute period options.
Notifications will be automatically unmuted after the specified period.
❇️ This feature is useful when you need to temporarily mute notifications. For example during deployment, testing, or maintenance at job site.
__
Last updated
Was this helpful?

